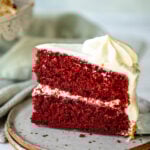
Red Velvet Cake Recipe Without Buttermilk
No buttermilk, no problem! Make my Red Velvet Cake Recipe Without Buttermilk, and you'll love this decadent cake. The tangy silky cream cheese frosting is the golden final touch that ties this cake together. It's perfect for the holidays, Valentine's Day, Mother's Day, weddings, or when you just want some really good cake. Add this dessert to your repertoire of go-to desserts.
Servings: 12 servings
Ingredients
Red Velvet Cake
- 1 cup whole milk
- 1 Tablespoon white vinegar
- 2½ cups all-purpose flour
- ½ teaspoon salt
- 1 teaspoon baking soda
- 2 Tablespoons cocoa powder
- ½ cup softened butter unsalted
- 1 cup granulated sugar
- ¾ cup vegetable oil or any neutral oil
- 2 large eggs at room temperature
- 2 teaspoons vanilla extract
- 2 Tablespoons red food coloring
Cream Cheese Frosting
- 16 ounces cream cheese blocks softened
- 8 tablespoons butter softened
- 4 cups powdered sugar
- 2 teaspooons vanilla extract
Instructions
- Preheat oven to 350℉ (180℃). Grease and flour 2 9-inch cake pans.
- In a medium mixing bowl, combine the whole milk and white vinegar and set aside.
- Sift together the flour, salt, baking soda and cocoa powder.
- In a large mixing bowl or the bowl of a stand mixer set to medium speed and fitted with the paddle attachment, cream together the butter and sugar for about 5 minutes. Add the oil and mix to combine. Add the eggs and mix to combine. Add the milk and vinegar mixture and vanilla extract and mix to combine.
- With the mixer on low speed or mixing gently, add half of the flour mixture, mix to combine, then add the other half of the flour mixture and mix until well incorporated. Do not overmix.
- Add the red food coloring and mix until well combined,
- Pour half of the batter into each prepared baking pan. You can weigh each pan to make sure each baking pan has the same amount of batter.
- Bake in the preheated oven for 22 minutes until a toothpick inserted in the middle of the cakes comes out clean.
- Let the cakes cool in the pan for 10 minutes then transfer them onto a wire rack and let them cool completely for about one hour or more.
Frosting
- To make the frosting, beat the cream cheese, butter, powdered sugar, and vanilla extract until light and fluffy. If the frosting is too sweet, add salt to balance the sweetness. I suggest starting with a quarter teaspoon of salt, then adding more if needed.
- Fill and frost the cooled cake: Using an offset spatula, pread a layer of cream cheese frosting on top of one cake. Place the cake's second layer over the cream cheese frosting spread, then spread more cream cheese frosting over the second layer. Finally, spread frosting all around the cake and smooth it to the best of your capabilities. If you have more frosting, add it to a Ziploc bag fitted with a star tip. Then, pipe pretty swirls of frosting over the cake to decorate it. I love to add some fresh strawberries as decoration as well.
Notes
- This batter will fit into other pans besides just 9-inch round cake pans! For example, you can divide the batter into two loaf cake tins (8 x 4 inches) or two rectangular baking dishes (11 x 7 inches). It will also fit into 8-inch rounds but will be a bit thicker, so you might need to extend the cooking time a bit (same with the loaf pans).
- Want to plan ahead? If you are making this cake for an event, I suggest baking the cake on one day, then making the frosting and decorating it on the next day! It is easy when you split up the project like this. After the first day, make sure to tightly wrap the cakes so they are ready for the next morning.
- If you have leftover frosted red velvet cake, it needs to be refrigerated because of the cream cheese icing. You can keep it in a cake container with a tall lid or keep it on a platter and carefully wrap it once the cream cheese frosting sets up and won't stick to the plastic wrap.
Nutrition
Calories: 574kcal | Carbohydrates: 82g | Protein: 7g | Fat: 44g | Saturated Fat: 20g | Polyunsaturated Fat: 9g | Monounsaturated Fat: 11g | Trans Fat: 1g | Cholesterol: 108mg | Sodium: 447mg | Potassium: 137mg | Fiber: 1g | Sugar: 19g | Vitamin A: 1050IU | Calcium: 76mg | Iron: 2mg